
Remember starting out your smoking career? Chances are, when it came to your turn to assemble the joint, you couldn't roll for toffee. Rolling a good joint is second nature to a seasoned stoner, but it takes a lot of practice get the knack. Fortunately, the wonders of ingenuity means there’s a handy substitute for skill. As the saying goes, necessity is the mother of invention, and some very bright spark had the genius idea of creating a machine that can roll the perfect joint every time. A joint roller can save your sesh whether you’re a rank amateur who hasn’t mastered rolling yet, or you’re just too darn high to construct a smokeable doobie. Either way, this article is for you.
We’re going to break down how to roll a joint with a joint roller step by step, covering the gear you’ll need, the right techniques, the common mistakes, and why these pocket-sized gadgets have become staples in stoner circles from Aberdeen to Zouch.
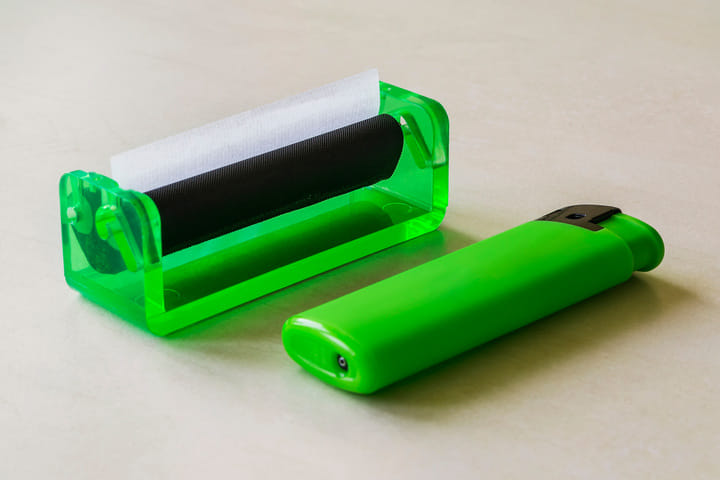
What Is a Joint Roller?
A joint roller is a nifty little device designed to do the hard work of rolling for you. Usually made of durable plastic with two rolling bars and a rolling mat, it’’s like a mechanical thumb and finger combo that never messes up.
They come in different sizes, too – standard for single-skin joints, king size for bigger spliffs that get passed around the circle, and even cone rollers for those of us who like their joints fatter at one end. Simply put, it’s your best mate when your rolling skills are sub-par.
Further Reading: A Fun And Super Easy Guide to Rolling A Joint
Why Use a Joint Roller?
Let’s be real – rolling by hand is an art. Some of us get it down after a couple of weeks of practice, others struggle forever, and some of us are just too blazed to care. That’s why it’s worth learning how to roll a joint, blunt, or spliff with a joint roller. They offer:
Consistency: Every joint comes out uniform and smokeable.
Speed: Knock out a perfectly-formed doobie in under a minute.
Accessibility: Great for beginners or anyone with limited dexterity.
Less Waste: No more spilled bud and tobacco all over the place.
If you’re wondering how to roll a joint with a joint roller, the answer is: quickly, easily, and cleanly.
Different Types of Joint Roller
Like strains of weed, joint rollers come in different varieties:
Standard Size Rollers: Best for everyday smokes, these produce a joint the size of a hand-rolled cigarette.
King Size Rollers: Perfect if you’re prepping for a long session or a group blaze.
Cone Rollers: Specifically shaped for pre-roll cones – handy if you like that dispensary-style finish.
Rolling Mats: Old-school bamboo mats, these look a bit like sushi rollers for spliffs. Quirky and cool, but a little trickier to master and not nearly as fool-proof as plastic joint rollers.
Electronic Rollers: Technology advances at an impressive rate, and naturally, you can now buy a battery-operated joint roller which does the rolling part automatically. If you’re someone who loves good gadgetry, expect to pay around twenty quid for one of these devices.
When deciding how to roll a joint with a joint roller, choose the right size to match your rolling papers and the vibe you’re going for. You can pick up a joint roller from your favourite online retailer for as little as two or three pounds, or if you’re out and about, there’s plenty of urban hardware stores and tobacconists in the UK who offer a range of smoking paraphernalia. If it's the kind of place that's bold enough to put a selection of bongs in the shop window, chances are, they’ll have joint rollers inside.
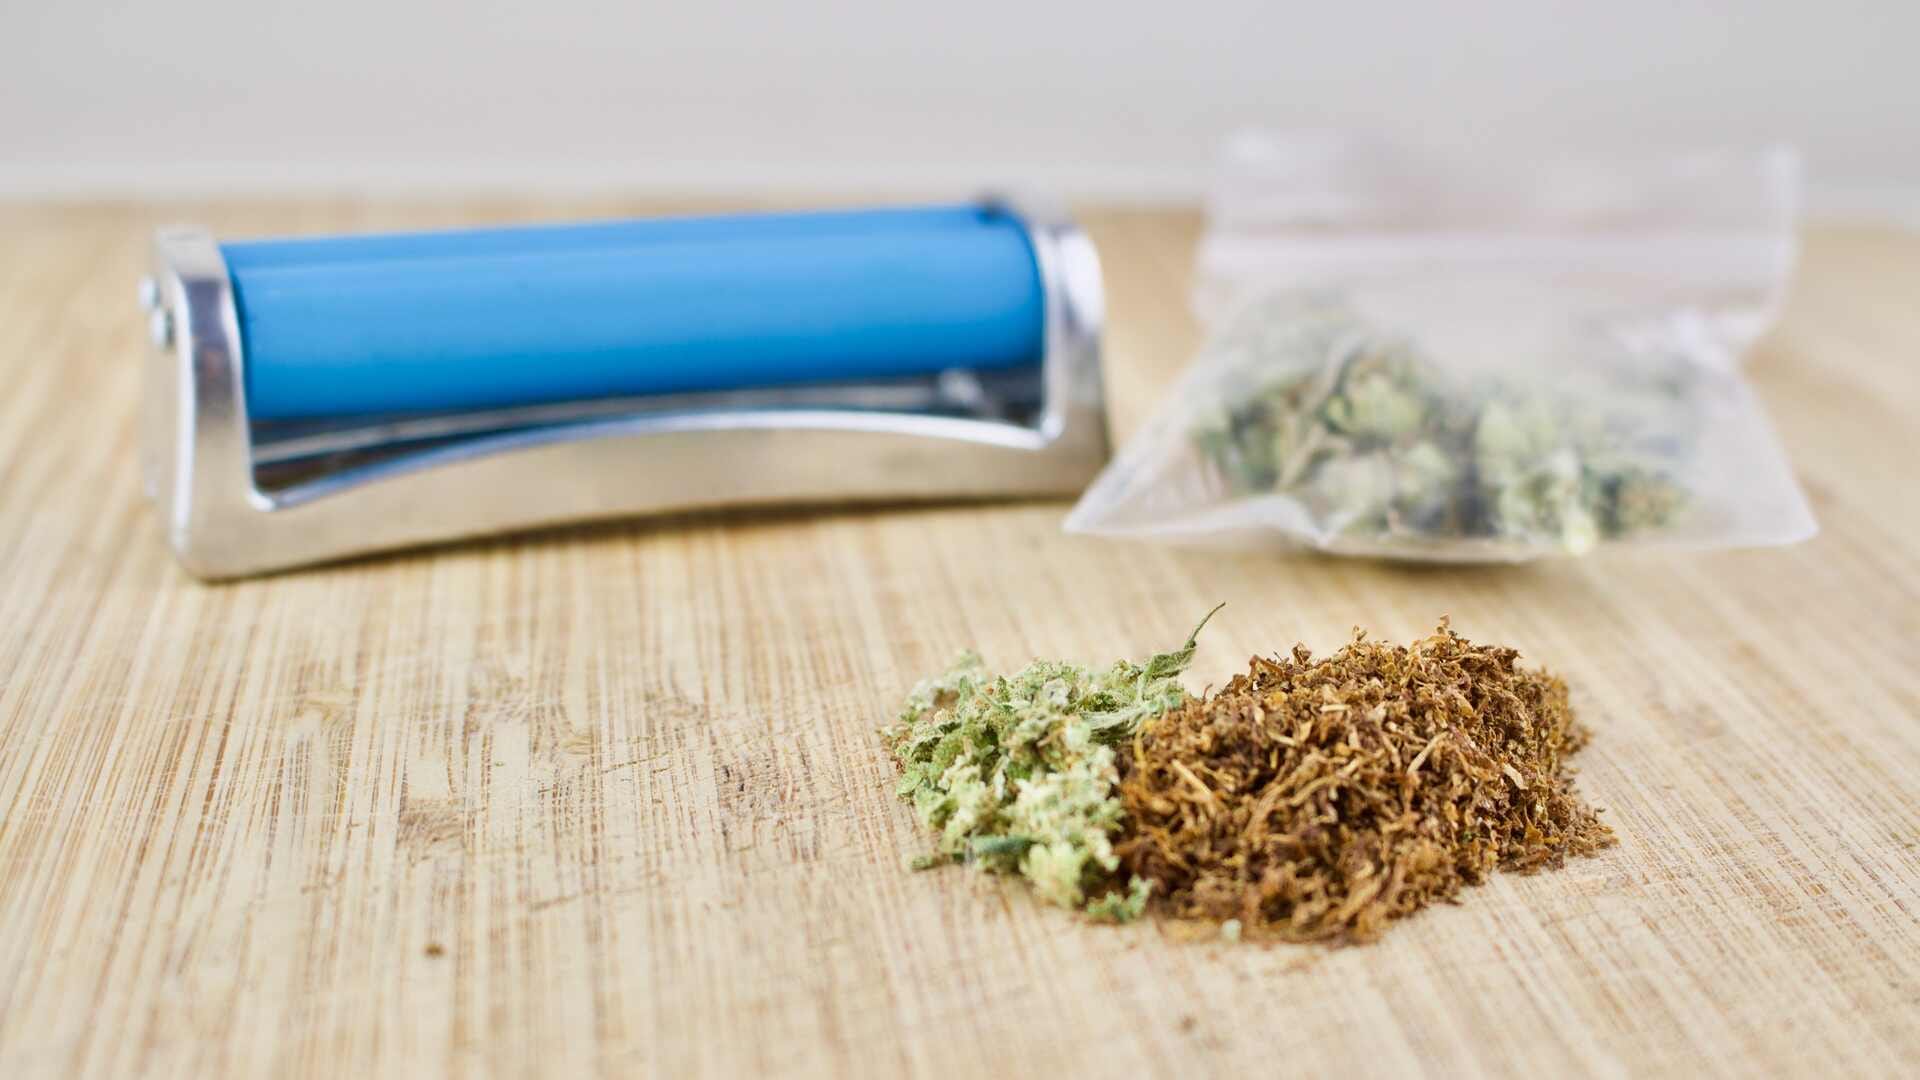
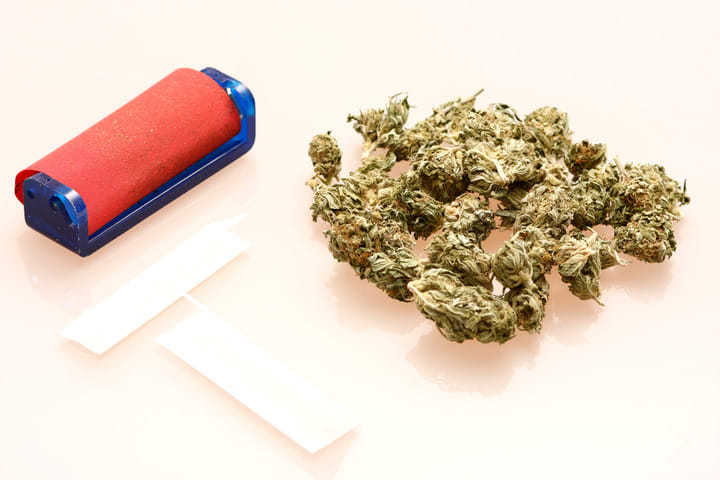
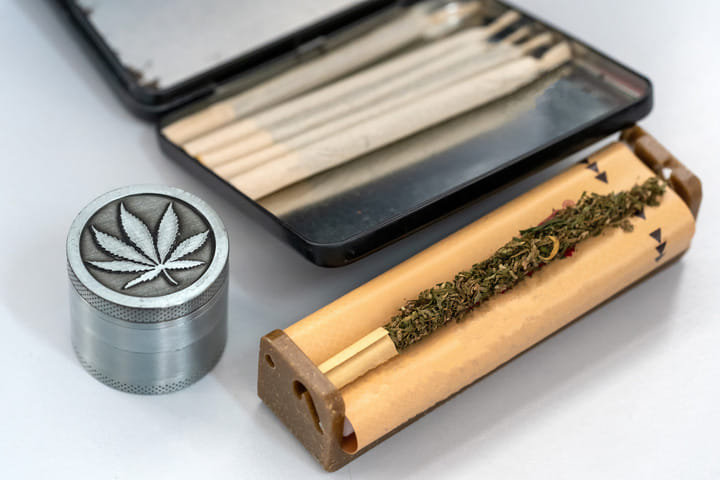
How To Roll a Joint With a Joint Roller: Equipment
Before you learn how to roll a joint with a joint roller, you need to get your kit together. For this article, we’ll assume your using cannabis flower, but you can also use nice moroccan hash. Assemble the following gear:
- Cannabis flower
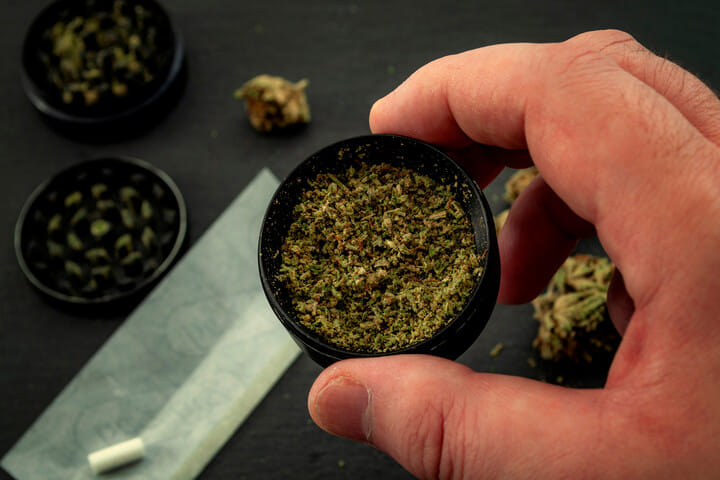
- Grinder (metal grinders work best)
- Joint rollers (size of your choice)
- Rolling papers (personal taste – king skins, Rizlas, ZIgZags, Highlanders, or best of all, Seedsman Skins)
- Filter Tip/cardboard roach
- Lighter
Sorted? Right, let’s roll.
How To Roll a Joint With a Joint Roller (Step By Step)
Finally – the bit you came for – the definitive guide on how to roll a joint with a joint roller. We’ll break it down clearly and in the right order so you can’t go wrong.
Grind Your Weed
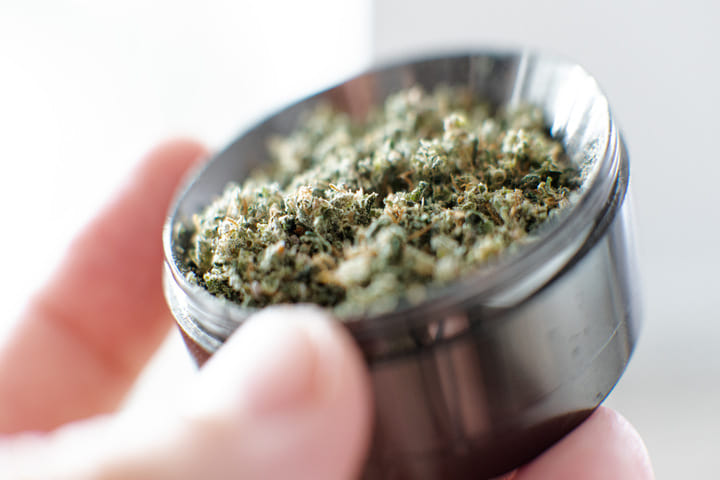
First, bust out your grinder and give your bud a good spin. You want a nice, even consistency, not dusty powder but not chunky rocks either. Think fluffy, like crushed herbs. This makes it much easier and smoother to smoke.
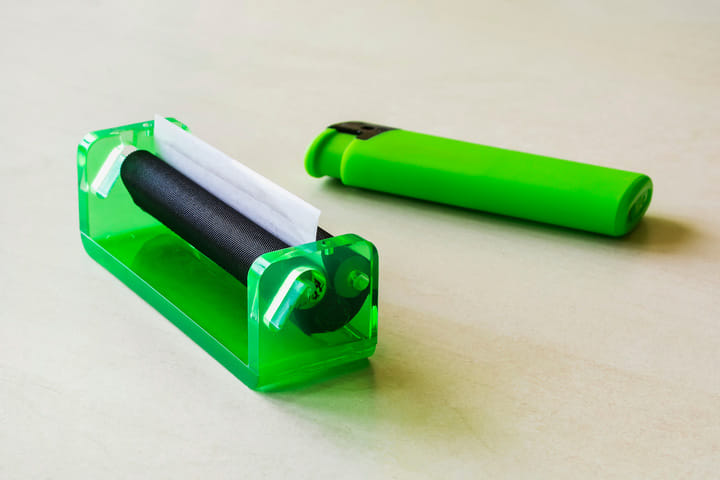
Prepare The Roller
Open your joint roller by gently sliding the two bars apart. You may find a small latch at the side that has to be moved to let the rolling compartment open up. This creates a neat little trough where your cannabis will go.
Add The Filter or Roach
Roll up your roach and place it one end of the roller. This keeps your smoke smooth and stops bits of green or tobacco ending up in your mouth when you inhale (a highly unpleasant experience).
Fill the Roller
Whether you add tobacco to make a nice spliff, or you’re one of the hardcore element who goes weed-only, now is the time to add your ingredients. Sprinkle right along the length of the roller, right up to the filter. Be careful not to overstuff the roller here – it needs a bit of space to roll properly and if you overfill it, you’ll not only end up with an overly tight joint, you’ll shorten the lifespan of the rolling machine, too (speaking from experience here).
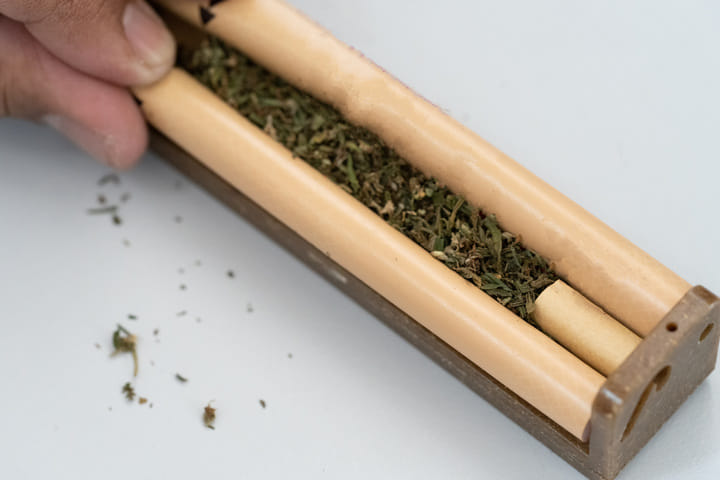
Close and Roll
Click the bars back together. Roll them towards you a few times by pushing down with your thumbs so the contents pack down into a nice tight cylinder.
Insert the Rolling Paper
Grab a paper and slide it into the roller with the gum edge facing you, and upwards. Roll the bars forward until only the sticky strip shows.
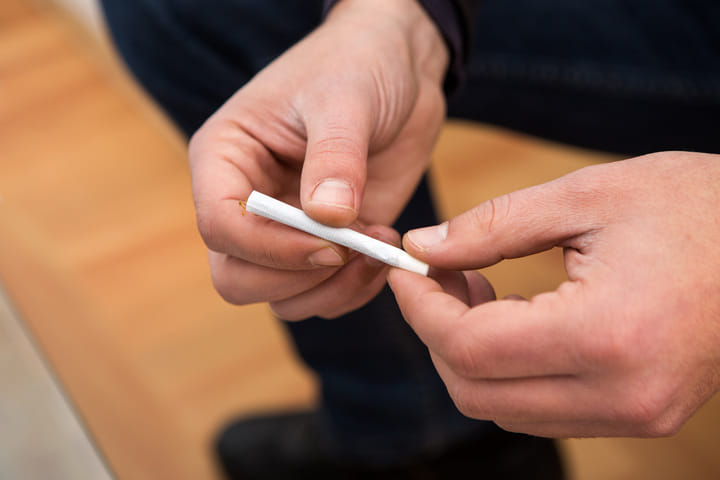
Seal the Deal
Lick the gum, and roll again to seal the joint. Open the roller, andout pops the perfect spliff.
Spark it Up
Give it a gentle tap to settle the weed, then twist the end. Light up, inhale, and thank the cannabis gods for modern invention. Congratulations – you've just learned how to roll a joint with a joint roller!
It’s as easy as that – no fuss, no muss, no ripped paper, no uneven, wonky joints. Just a nice, uniform pack and an aesthetically-pleasing joint.

Common Mistakes When Rolling WithA Joint Roller
A joint roller makes everything so much easier, but hardly anything is completely foolproof. Even with a joint roller, there are a few rookie errors to avoid:
Overfilling:Leads to torn papers, overly-tight joints, or an uneven joint of weed that burns too fast.
Wrong PaperSize:Don’t try to stuff king skins into a standard roller.
Loose Roll: Failure to roll the bars enough makes the joint floppy.
Over-rolling: Rolling ten times or rolling too aggressively will compromise the quality of your end product. One or two gentle spins of the roller is all you need for perfection.
Forgotten Filter: Some tokers try to add the roach after rolling, but this can be a real hit-or-miss scenario – the end of the paper may end up nipped too tight to get the roach in, leading to a damaged joint. Add the roach beforehand.
Backwards Paper: Make sure the gum side is facing you – otherwise you’ll be licking for nothing and your joint won’t seal.
How To Roll A Joint With A Joint Roller: Final Thoughts
Learning how to roll a joint with a joint roller is a game-changer, especially if your hand-rolling skills leave a bit to be desired. It’s quick, clean, and reliable, giving you more time to enjoy your smoke rather than battling papers.
So next time you’re too blazed to roll or just fancy a perfectly packed joint, just grab a joint roller and let the little gadget do the graft.
