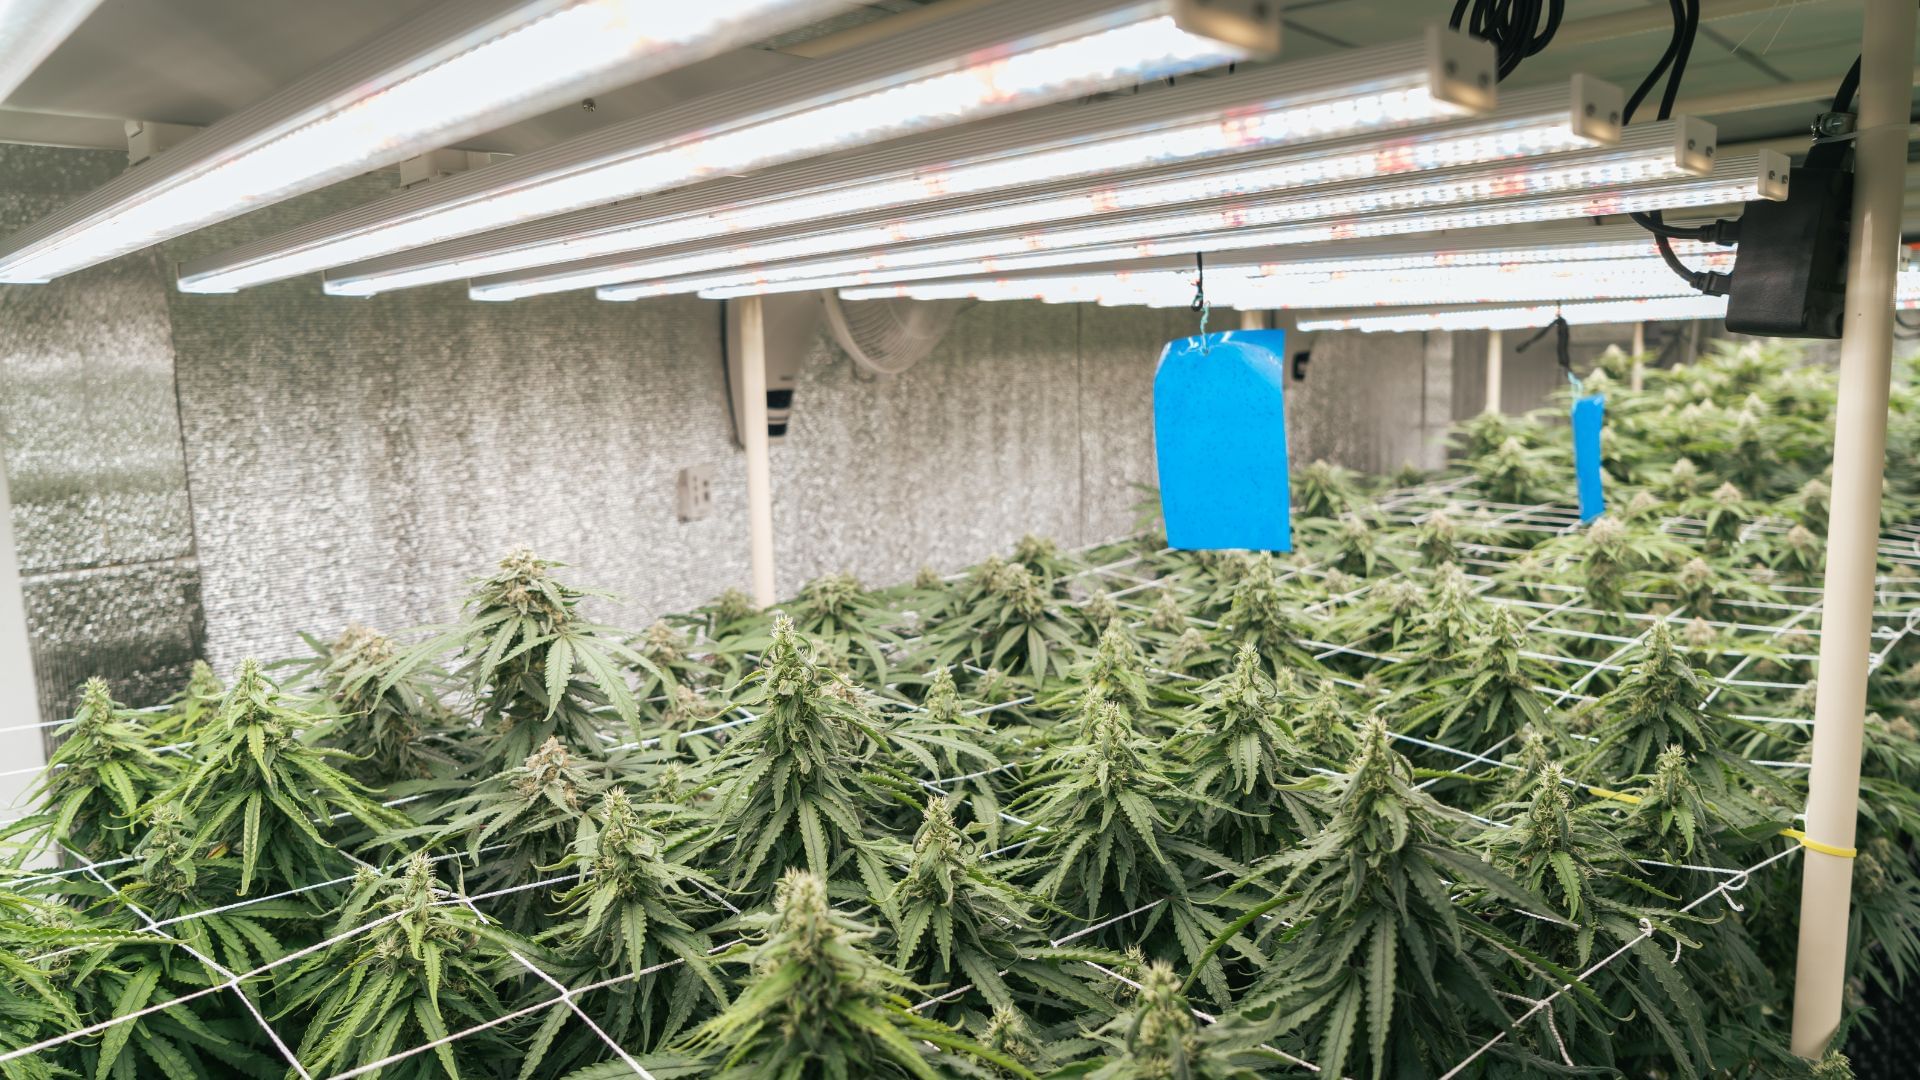
When it comes to cultivating cannabis plants in an indoor grow room, the precision of the lighting of the plants is key. While it might seem straightforward, the science of grow room lighting is intricate, involving much more than a hook and long extension cable. Secondary considerations force growers to ensure that not only do their plants receive the right amount of light, but maintain the ideal temperature and consistency in coverage. In this article we cover five basic formulas you need to know for lighting a grow room. These formulas are not just maths for the sake of maths; they are the keys to unlocking the full potential of the lighting set up so that growers get the most out of their space. From calculating the optimal light coverage and balancing room/light temperature, determining the right distance between the lights and plants can all provide a foundation for making informed decisions about the lighting setup. It's worth noting that experienced growers are less concerned with these as often experience can teach better than maths can. However, for some, putting it down on paper and solving an equation will provide the right kind of precision.
Light Coverage
C = A/(N x S)
The total coverage area needed is represented by the letter C. ‘C’ is the total area within the grow room that needs to be illuminated effectively by the grow lights, i.e. the light required by the canopy. Calculating this is essential to ensure that every part of your plant canopy receives sufficient light for optimal growth. Different lights have different coverage capacities based on their design, intensity, and the height at which they are placed. Not all lights are created equal, so the quality of the light used will always be a variable, but it won’t be considered here.
The total coverage area needed should match or exceed the canopy area to avoid uneven growth or areas with insufficient light. We need to know the other factors to solve for' C'. The first is the total canopy area, represented by ‘A’. The canopy area is a critical factor because it directly impacts how much light your plants need. Larger canopy areas require more light to cover them evenly. The second and third parts of the equation are the size of the individual light ‘S’ and the number of lights ‘N’. These allow the calculation to deal with the light coverage by combining the total number of grow lights with the light spread of each light.

It is worth noting that the more lights you have, the greater the potential coverage area. However, simply having more lights doesn't automatically mean better coverage; the placement and area each light covers are also essential to prevent overlighting.
C is the total coverage area needed.
A is the total canopy area.
N is the number of lights.
S is the size or coverage area of each individual light.
The formula C = A/(N x S) or Coverage = Area divided by the Number of lights multiplied by the Size of light helps in planning and setting up cannabis grow room lights. By adjusting the number of lights ‘N’ or the coverage area of each light ‘S’, you can achieve the required total coverage area for the growing space/plant canopy. This consideration is crucial for uniform plant growth, as inadequate light coverage can lead to poor or inconsistent growth, which will affect both yield and quality.
Temperature
T = (H x F)/R
Temperature control of the grow room is another key aspect of cannabis growing, which can significantly affect the output. The lights often play a massive role in heating a grow room, but they can also be factored into an equation. ‘T’ represents the optimal temperature in the grow room. Although this might be a set point, running this formula is a worthwhile exercise for those who haven’t yet set up their grow area. Represented by ‘H’, the heat output is the amount of heat emitted by the grow lights. Different types of lights emit different amounts of heat. For example, LED lights generally emit less heat than HID (High-Intensity Discharge) lights. ‘F’ is for the heat dissipation factor; this is the effectiveness of the grow room's ventilation and cooling systems in dissipating the heat generated by the lights. It can include variables such as the efficiency of air circulation systems, the presence of heat sinks, and the overall design of the ventilation system.

The value of 'F' is higher if the grow room has efficient cooling and ventilation, meaning less effort is needed to maintain the optimal temperature. Finally, ‘R’ is for the room size and insulation, a combined factor that affects both size and ability to lose heat. A larger room might require more effort to cool, and better insulation can help maintain stable temperatures. The 'R' factor is crucial in determining how quickly and effectively the heat from the lights can be managed within the space. Test this by measuring the time it takes to move the temperature from one set point to the next.
T is the temperature control effort required.
H is the heat output of the grow lights.
F is the heat dissipation factor of the room.
R is the room size and insulation factor.
T = (H x F)/R or Temperature equals Heat output multiplied by the dissipation Factor, all divided by the size of the Room and insulation factor.
The next two formulas are very related and, therefore, have been combined into the fifth formula. However, it is important to know these next two to get to the fifth.
Distance
D = k x (sq rtP)
The distance of lights from plants can often be an issue for those working in small spaces. Add in that different types of grow lights (LED, HPS, etc.) have different light distribution patterns and intensities; distance management is crucial. The optimal distance is the ideal distance between the light source and the plants. This is an easy equation, but it’s a little bit difficult to calculate for ‘k’ in this one. k is a constant that adjusts the formula to suit specific grow room conditions and plant requirements. It accounts for variables like the type of plant, its growth stage, and the specific requirements of the light source being used. For example, seedlings require less intense light and thus a larger 'k' value to increase the distance, while mature plants in the flowering stage may need a smaller 'k' value to decrease the distance and increase light intensity. ‘P’ is the power of the light source. This represents the wattage or power output of the grow light. Higher-wattage lights are generally more intense and cover a larger area, necessitating a greater distance to avoid plant damage. The square root of the power is used in the formula to provide a proportional relationship between the light’s power and the optimal distance.
D is the distance
k is the constant
P is the power output of the light
D = k x (sq rt P). This equates to Distance equals the constant(K) multiplied by the square root of the Power output.
Since most lights come with a suggested distance you can convert this formula to find the value of ‘k’ the constant.
Original :– D = k x (sq rt of P)
Solve for ‘k’: – k = D / (sq rt of P)
Light Intensity
I = P/Dˆ2
Light intensity ‘I’ is as it sounds, the intensity of the light at a given point, typically measured in units like lumens or lux. It represents how much light energy is available to the plants in that specific area. This formula indicates that light intensity is inversely proportional to the square of the distance (D) from the light source, where ‘P’ is the power source of the light.
I is the light intensity
P is the power of the light source
D is the distance from light
Intensity equals the Power output divided by the Distance squared, I = P/Dsq
Light Intensity/Distance
I = (P x k2)/Dˆ2
To combine these, first, some rearrangement of the formula is needed, and solving for other parts will lead us to this. Where ‘I’ is the light intensity, ‘P’ is the power of light at source, ‘k’ is the constant and ‘D’ is the optimal distance already calculated. Therefore the light intensity is a function of the power multiplied by the constant, all divided by the optimal distance squared! This can be very important, especially if the lights have no power control, i.e. are on or off. Lights that can be dimmed obviously negate the need for this formula, but calculating light intensity and distance from light can be very handy for those trying to make a tight plan before building or equipping the grow space.
Light Intensity equals the Power multiplied by the constant (k) all divided by the optimal Distance squared!. I = (P x ksq)/Dsq
Conclusion
Light optimisation in a grow room is crucial to maximise returns. The above formulas may help at least in part with the decisions growers make to utilise their lights, or design their room. Always follow instructions from the manufacturer of the light first, and adjust if things aren’t going well. Using the above formulas you may be able to understand what has happened if there is a problem, in a troubleshooting capacity.
